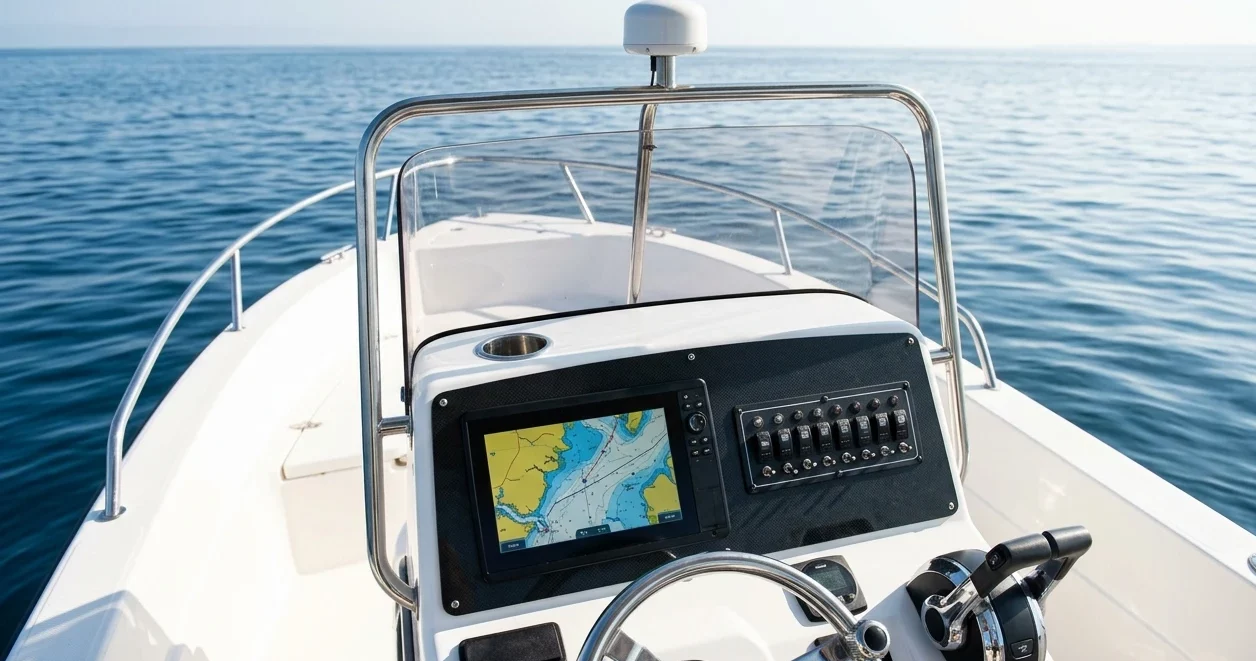
A chartplotter is the main navigation display on most cruising boats, and a handheld GPS is the second. The best tablet for marine navigation backup covers what those two cannot: a large screen, full charts, and a route plan you can read when the plotter is dead, flooded, or showing a blank screen. A tablet is a consumer device built for a living room, and a boat will test it with salt, heat, glare, damp, flat batteries, and falls. This article judges a tablet by those failures rather than by its spec sheet.

Why a tablet is your third display, not your second
The second display should be the one least like the first. A battery-powered handheld GPS is sealed, rugged and independent of the boat’s electrical system, which is why it earns that place. If you have not chosen one yet, the handheld GPS comparison covers what to look for.
A tablet fills a different gap. Its screen is far larger than a handheld’s, so you can see a whole passage, zoom a harbor approach and read a route without scrolling. Its weakness is that it was not designed to be navigation equipment. Its battery drains fast with the screen on, its touchscreen misreads wet fingers, and its software can update, crash or ask you to sign in at the worst moment.
Treat it as the third layer and set your expectations to match:
- Chartplotter: primary display, powered from the boat.
- Handheld GPS: independent position and waypoints, running on its own batteries.
- Tablet: a large-screen backup for charts and routes that must be protected, powered, and tested because nothing about it is marine-grade by default.
The tablet also shares a limit with the other two. All three depend on the same satellite signals for position, so none of them helps if the GPS signal itself fails. Six ways GPS lets sailors down lists those failures and the backup for each. The tablet covers the failures on your boat: a dead plotter, a lost helm display, a power fault.
Keep it physically separate from the plotter’s failure modes too. A tablet that is switched off, fully charged, and stored in a protective case away from the nav station will survive a power surge or a flooded locker that kills the plotter. A tablet permanently wired to the same 12V circuit as the plotter does not.
Built-in GPS or not: what the tablet needs to know where it is
A tablet with no GPS receiver cannot show your position on a chart, no matter how good the chart app is. Many Wi-Fi-only tablets have no GPS chip. Some estimate location from nearby Wi-Fi networks and cell towers, which does not work in the middle of an ocean or a quiet anchorage. Cellular models usually include a satellite receiver. That receiver works without a SIM card or a data plan, but confirm it for the exact model before you buy, because specifications vary by manufacturer and year.
You have three ways to give a tablet a position:
- Built-in GNSS. The simplest option. Check the spec sheet for GPS, GLONASS, Galileo, or BeiDou, and read boaters’ reviews on how quickly it gets a fix indoors, in a cabin, or below a coachroof.
- An external Bluetooth GNSS receiver. A small puck mounted where it can see the sky. This suits a Wi-Fi-only tablet and often gives a better fix than the tablet’s own antenna when the tablet sits below deck.
- Position from the boat’s network. Some chartplotters, AIS units and NMEA multiplexers can send data to tablets over Wi-Fi. This is convenient, but the tablet then depends on the same instrument that may have failed. It is a useful extra, and it cannot be your only source.
For a backup, the second option is often best if the tablet has no GPS of its own. It makes the tablet independent of the chartplotter, which is the point of a backup.
Test the fix where the tablet will actually live. A tablet that locks position on the cockpit seat may lose it at the nav station under a fiberglass deck. Note how long a cold start takes, and what the app does when it loses position: it should say so plainly, not leave the last known position on screen.
Screen brightness and glare: reading it in a cockpit at noon and a cabin at 3 a.m.
The two extremes matter equally. At noon in the cockpit, sunlight washes out most tablet screens. At 3 a.m. below, a screen on its lowest setting can still be bright enough to cost you your night vision, and if it is, you will be tempted to switch it off and lose the backup you built.
For daylight use:
- Look for a high maximum brightness, which manufacturers list in nits. Higher is better, though real-world readability also depends on the screen coating and how the screen sits behind a case.
- A matte screen protector reduces reflections but softens the image slightly. Test one before you commit, because a thick or scratched protector costs more clarity than it saves glare.
- Polarized sunglasses can make some LCD screens go dark at certain angles. Try your own sunglasses against the tablet in both portrait and landscape.
- Shade helps more than brightness. A sprayhood, a dodger or a simple fabric hood around the screen makes it readable at lower settings.
Heat is the hidden cost of glare. A tablet in direct sun, especially in a dark case, can overheat. Many tablets respond by dimming the screen or shutting down to protect themselves. Keep it in shade, avoid leaving it on a dashboard-style mount in full sun, and pick a lighter-colored case.
For night use:
- Check that the tablet dims low enough. Some screens cannot go dark enough using the brightness slider alone, and the operating system may have an extra dimming or color filter setting.
- Use the chart app’s night palette, which swaps white backgrounds for dark ones, and a red-tinted mode if the tablet or app offers one.
- Do all this setup before the passage, in a dark cabin, not on the first night watch.
Your own eyes are the test. If you cannot read the chart at noon and cannot keep your night vision at 3 a.m., change the screen settings, or choose a different tablet.

Waterproof rating, rugged cases, and what a dry bag will not save
Waterproof ratings use an IP code, such as IP67 or IP68. The first digit covers dust and the second covers water. A rating of 7 or 8 means the device can survive temporary immersion in fresh water under test conditions, and each manufacturer states the depth and time. It does not mean the device is built for saltwater, constant spray, or years of use on deck.
Three limits apply on a boat:
- Salt. Saltwater dries to crystals that get into ports, speaker grilles, and seams. It corrodes charging contacts and wears seals over time.
- Aging seals. Water resistance is tested on new devices. Seals loosen after drops, repairs, and heat cycles.
- Open ports. The charging port creates a gap in the seal when in use, and some devices only keep their rating with the port cover closed.
So treat the rating as a margin of safety, not permission to leave the tablet in the rain.
A rugged case adds what the rating does not: impact protection. Look for:
- Corner and edge protection for a drop onto a hard deck.
- A built-in screen cover or a separate screen protector that does not block touch.
- Port covers that actually close over the charging and headphone sockets.
- A hand strap or tether point, so a wave or a stumble doesn’t send it overboard.
- A case that dissipates heat, because some thick cases trap it.
A dry bag keeps water out when the tablet is stowed. It does nothing for impact, and it is awkward to read through. Clear waterproof pouches let you use the tablet inside, but touch response often suffers, glare increases, and heat and condensation build up inside the sealed pouch. Any bag you seal in a humid cabin traps that humid air with the tablet. Putting a small silica gel pack in the stowage bag is a cheap precaution against damp.
Stow the tablet where you can reach it fast. A backup you have to dig out of a locker in bad weather is a backup you will not use.
Mount it where you can use it and where it will not fly across the saloon
In heavy weather, an unsecured tablet becomes a projectile. Plan two places for it: a mount where you use it, and a padded stowage place where it lives the rest of the time.
At the nav station:

- Use a mount with a positive lock, not a friction fit. Boat motion shakes friction mounts loose.
- Put it where you can read it and still reach the chartplotter, VHF, and paper chart.
- Keep it clear of anything that can crush or spray it, such as the companionway steps, a hatch, or a leaking port.
In the cockpit:
- Suction cup mounts can fail in heat and salt film, and a tablet falling from a pedestal is a likely way to lose it. A bolted bracket or a lanyard-secured arm is more reliable.
- A tether from the tablet to a fixed point lets it hang instead of falling overboard or across the deck.
- Do not block the compass, the steering position or a sightline to the sails.
Magnetic mounts need care. The magnets can affect a nearby compass, so check the steering compass and any handheld compass after you fit one.
When not in use, keep the tablet in a padded case that is itself secured, for example in a pocket by the nav station or a bag clipped to a fixed point. Think through where it ends up if the boat rolls through 90 degrees. Anything it can hit, or fall from, is a risk to the tablet.
Keeping it charged: 12V sockets, power banks and the power budget
A tablet with the screen on at navigation brightness uses a lot of power. A battery that lasts a long time on a sofa will last much less with the screen at full brightness, GPS running and the display never sleeping. Measure the drain yourself: charge it fully, run the navigation app at your sailing brightness for an hour, and see how much battery is gone. That one number lets you work out your realistic runtime.
For charging on board:
- 12V sockets. A USB adapter in a 12V socket is the usual route. Cheap adapters can be inefficient, can charge slowly, and some produce radio interference. Test any new adapter with the VHF and AIS running, and listen for noise.
- Charging speed. A low-power USB port may not keep up with a tablet running at full brightness. The battery percentage can fall even while it is plugged in. Check that the adapter provides enough power for your tablet’s charger specification.
- Cables. Use good-quality, short cables with a firm connector. A loose connector in a moving boat can wear the port, and the port is the part most likely to fail first.
- Corrosion. Keep connectors dry and check them for green or white deposits.
A power bank gives you an independent source. Keep one charged and dedicated to the tablet. Check its capacity, which is printed on it in watt-hours or milliamp-hours, against your tablet’s battery capacity and your measured drain to estimate how many full charges it provides. Store lithium power banks away from heat and from flammable materials, and not in a sealed locker that can get hot.
The tablet is also a load on the boat’s own power system. If you are not sure how it fits, how to build a power budget for your boat’s safety systems walks through the arithmetic. If the tablet is meant to survive a failure of the house battery bank, it needs its own power source, which is also the argument in why your safety electronics die with the house bank.
Charts and apps loaded offline before you leave the dock
A navigation app that relies on a data connection is useless offshore. Download everything while you still have a good connection, and prove that it works without one.
Before departure:
- Download charts for the whole route, plus margin. Include harbors you might divert to, not only your planned stops. Many apps download charts in regions or tiles, so check each region is complete, with no gaps in coverage at the zoom levels you need for harbor approaches.
- Check the chart type. Raster charts, which look like scanned paper charts, and vector charts, which let you click objects for details, behave differently. Know which type your app uses and what each shows at different zoom levels.
- Download other data. Tides, tidal streams, pilot information, anchorages, and your route can all be stored offline. Weather files need to be downloaded separately and are time-limited.
- Turn on airplane mode and test. Put the tablet in airplane mode, open the app, pan across the whole route, and zoom into a few harbors. If a chart region fails to load, you have found the problem at the dock.
- Switch off automatic updates. An operating system or app update at sea can change the interface or break a feature. Install updates deliberately, at the dock, and test afterward.
- Sort out logins and licenses. Make sure any paid chart license is activated and that the app does not need to check in online. Check what happens after a reboot.
Check what your flag state, insurer, and risk plan require for paper charts. Many sailors carry paper charts of key areas alongside the electronic ones, and an app on a tablet does not always meet legal chart-carriage requirements. This depends on where you sail, so confirm it locally.
Testing it against your chartplotter before you rely on it
A backup you have never compared with the primary is a guess. Spend a day, or a short passage, checking it properly.
Run these checks:
- Position comparison. Put the tablet and the chartplotter side by side and compare position, speed over ground, and course over ground. Small differences are normal, but a large or growing difference can indicate a problem with the fix or the chart datum setting.
- Known marks. Pass a charted buoy, a harbor entrance, or a headland and see whether the tablet agrees with what you see and with the plotter.
- Airplane mode run. Do the whole test with no data connection, so you see what offshore will be like.
- Brightness and glare. Check readability in full sun and at night, with the sunglasses you actually wear.
- Radio interference. Transmit on VHF and run AIS while the tablet is charging, then listen for noise or watch for the tablet misbehaving.
- Battery drain. Run it for a long stretch at sailing brightness and compare the result with your estimate.
- Heat. Leave it in the cockpit in the sun for a while and see whether it dims, warns, or shuts down.
- Touch in damp conditions. Try the touchscreen with damp or gloved hands. Know which controls you can still reach, and whether a stylus or gloves help.
- Cold start. Power it off completely, then boot it and get a position. Time how long that takes, since this is what you will do in a real failure.
Write down what you find. If you also run a handheld GPS, compare all three displays. The pattern of agreement and disagreement tells you which source to trust when they differ, which matters on a night watch. How to run a night watch with radar, AIS and a chartplotter covers how to cross-check instruments without trusting any single one too much.
After testing, decide on the tablet’s role. Keep it charged, with charts current, stored in its case, and checked before every passage. A tablet that has passed these tests, with sensible protection, mounting, and power, is a reliable third display. One that has not is only a device you hope will work.
This article was created with AI assistance and reviewed by a human editor.
Disclosure: This post contains Amazon affiliate links. If you buy through them, we may earn a small commission at no extra cost to you.
About The Author


