I have found that setting up a fishing GPS on a boat can make a huge difference in planning a trip and finding the best fishing spots.
A quality GPS navigational system helps me pinpoint key locations, plan a safe route, and monitor my progress on the water. In this guide, I provide step-by-step instructions to set up your fishing GPS on your boat, ensuring you can concentrate on enjoying your time out on the water rather than fumbling with complicated technology.
The process starts with picking the right device and continues through testing, fine-tuning, and even integrating additional features that help optimize performance. I share practical advice, clear explanations, and troubleshooting tips that are helpful for everyone—from beginners to seasoned boaters. Whether I am on a small fishing boat or a larger vessel, these steps have consistently given me a GPS system that meets my needs on every outing.
Step 1: Choose the Right Fishing GPS Device
Before installing a fishing GPS, it is very important to choose a device that suits your needs perfectly. I always compare different models and look closely at their features, making sure that the device I choose matches my fishing style and the unique challenges of my boating environment. A well-chosen GPS system gives reliable location tracking, accurate mapping, and an interface that is simple enough to use even when I’m on the move.
When selecting a fishing GPS device, consider the type of display it offers, the ruggedness of its construction, and its ability to receive frequent software updates. There is a wide variety available—some are built with special marine ratings, while others include extra features such as sonar integration. Taking the time to research and compare your options can be the difference between a frustrating experience and a system that genuinely works for you.
Questions to Consider When Picking a Device:
- What type of display does it have?. Consider factors such as color quality, screen size, and resolution to ensure that you can read your maps clearly under any lighting conditions.
- Does it have a waterproof or marine-rated case?. A durable, weather-resistant case is crucial for safe operation in varying conditions at sea.
- Can I update maps and software easily?. Look for models that allow for straightforward updates so you always have the latest navigational data.
- Does it come with additional features such as chat or sonar integration?. Extra functionalities can add value and improve your overall fishing experience.
- Is there an option for external connectivity (e.g., Wi-Fi, Bluetooth)?. Modern systems should allow you to connect with other devices for enhanced performance.
In my research process, I read reviews and compare technical specifications carefully. I even make a checklist of mandatory features to narrow my choices to those models known for durability and reliability on open water. It is also useful to talk to other boaters and share insights about the devices they trust during their fishing trips. This level of preparation helps ensure that the device you choose is an all-in-one solution for your needs.
Over time, I have come to appreciate how a wrong choice in equipment can lead to unexpected headaches during a fishing trip. That’s why investing extra time at this early stage is very important. Consider visiting local dealers or even renting a device before committing to a purchase. This hands-on approach can give you a better feel for the interface and usability of the system.
Step 2: Prepare and Install the Device on Your Boat
Once I have chosen a suitable fishing GPS, the next crucial step is to ensure that the setup process is smooth and effective. Installing the device correctly is key to having accurate readings and a secure attachment even in turbulent conditions. Preparation involves not only gathering all the necessary tools but also taking time to thoroughly read the user manual that comes with your device.
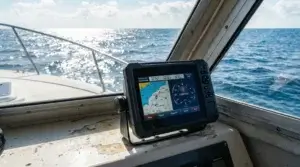
Installation is more than just physically mounting the GPS. I take the opportunity to map out my boat’s layout to choose the best possible mounting position. Ideally, you want a spot that offers unobstructed visibility of the display and a clear view of the outside environment. This decision impacts the performance of the device significantly, as a blocked or poorly chosen location could lead to interference with satellite signals.
Steps for a Successful Installation:
- Read the User Manual. It is important to familiarize yourself with any specific requirements regarding mounting and wiring by reading the directions carefully.
- Locate a Suitable Position. Find an area on your boat with excellent visibility and minimal obstructions, ensuring the display is always easily accessible.
- Confirm Secure Mounting. Use the proper brackets or mounting kits provided and secure the device firmly. This ensures that even in choppy or rough conditions, the GPS remains in place.
- Manage Wiring and Power. Ensure that all wiring is safely routed and that connections are well insulated from potential water exposure to avoid any short circuits.
- Consider Environmental Factors. Check that the mounting spot is not directly exposed to excessive spray or extreme sun, as these elements can impact the longevity of the device.
Taking a few extra minutes during installation can save you many frustrating moments later on. I always set aside additional time to double-check every connection and secure all wiring properly. It also helps to label wires and keep a record of the connections made, should you need to troubleshoot in the future. Many boaters have learned that a well thought-out installation can extend the life of the device significantly.
Furthermore, understanding the layout of your boat and the positioning of other electronic equipment is key. Neighbors, antennas, and other systems might interfere with GPS signals if not properly positioned. I recommend a test run on calm waters immediately after installation to verify that everything is working as intended.
Step 3: Update GPS Software and Maps
Once the device is physically installed, keeping both the software and maps updated is essential. Updated maps and software are not just about adding the newest features; they provide the latest information on water depth, potential hazards, and even pinpoint areas where fish are likely to be abundant. Having this information at your fingertips can truly make a difference during a fishing trip.
Updating is typically straightforward, but it is crucial to follow the instructions provided by the manufacturer carefully. Sometimes, the process requires connecting your device to your computer or taking advantage of built-in wireless capabilities. Regular updates protect you from navigation errors and ensure that you are benefiting from any enhancements or bug fixes the manufacturer has released.
Why Updating Software and Maps Matters:
- Accuracy. Updated maps reflect recent changes in the waterways and charts, meaning you can trust your device to lead you along the safest routes.
- Improved Features. Software updates often introduce new functionalities and tweak existing ones to provide an even better user experience.
- Bug Fixes. Regular updates help resolve persistent software glitches and ensure compatibility with other devices features you might use.
Steps to Update Your Fishing GPS:
- Connect your GPS device to your computer or ensure that its wireless connection is active.
- Visit the manufacturer’s website and look for the most recent software and map updates provided for your model.
- Download the updates and follow the step-by-step installation instructions carefully.
- After updating, restart your device to confirm that the latest software and maps have been applied correctly.
After completing the update, I always take a backup of my settings. This precaution helps me restore configurations if anything unexpected happens during the update process. I also document any improvements or changes I notice; sometimes, these small differences can lead to a significantly smoother experience on the water. In addition, checking for updates periodically—especially before long fishing trips—can ensure that you always have the latest navigational data available.
This step is not only about maintaining functionality; it reinforces your trust in the technology powering your adventures. By keeping your device’s software and maps current, you reduce the risk of errors and can fully rely on the guidance it provides.
Step 4: Configure Your Device for Optimal Use
Customizing the settings on your fishing GPS allows you to tailor its performance exactly to your needs. I personally adjust the device to display the most relevant information while on the water. The initial setup includes configuring measurement units, setting the display language, and choosing which map layers are most helpful during a fishing trip.
The flexibility to adjust these settings can make your experience much more enjoyable. For example, if you prefer to see depth contours and fishing hotspots more clearly, setting up the device to highlight these can save you time. Familiarizing yourself with the menu options and spending a little time tweaking settings is a valuable investment that pays off every time you head out on the water.
Essential Settings to Adjust:
- Coordinate System. It is important to select the coordinate system that your local waterways use or one that is compatible with your other onboard equipment.
- Map Layers. Decide which details—such as depth, terrain contours, and fishing hotspots—you wish to display. This customization helps simplify the information while ensuring you have all the necessary details.
- Waypoints and Routes. Learn how to mark and save important locations. This functionality allows you to quickly refer back to spots where you have experienced success before.
- Alerts and Alarms. Setting up notifications for various events, like nearing a waypoint or deviating from your planned route, can help prevent navigational errors.
- Brightness and Contrast. Adjusting these display settings can improve readability regardless of sunlight conditions, ensuring that you always see the data clearly.
Additional Customization Options:
- Track History. Enabling this feature allows you to record your fishing trips so you can review previous routes and adjust future outings accordingly.
- Speed and Time Data. Some devices offer performance analytics that can help measure how quickly you cover a fishing zone, providing insights on best practices for timing and speed adjustments.
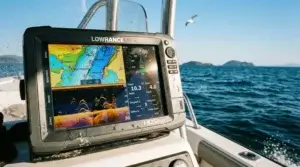
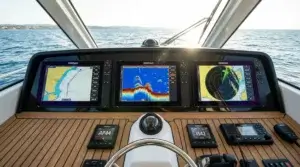
- Integration with Fish Finders. If your GPS permits, consider linking it with sonar or fish finder devices. This integrated view can combine navigational data with underwater readings, giving you a richer picture of your surroundings.
After adjusting these settings, I always perform a quick review to ensure that all preferences are saved correctly. Spending extra time here is very important, as it prevents misreadings and technical issues later on. I sometimes revisit these configurations before each trip, as different fishing locations may call for slightly different arrangements. It’s all about fine-tuning the system to make it as user-friendly as possible for every adventure.
Step 5: Calibrate and Test Your GPS Setup
Calibration is a crucial step to ensure that your device reads positions accurately. Before heading out on a long adventure, I always take the time to calibrate and test my setup thoroughly. This phase not only verifies that everything is functioning as expected but also builds my confidence in the system’s ability to perform under real conditions.
To calibrate, you must have your device located in an area with a clear view of the sky. This allows a strong satellite signal to be received by the GPS. During calibration, follow on-screen instructions closely and pay attention to any alerts or error messages that may appear. The process might include guided routines that ensure the device recognizes key waypoints and displays them correctly on the map.
How to Calibrate and Test Your Fishing GPS:
- Find a cleared and open area on the water where satellite signals are strong.
- Perform any calibration routines your device offers by following the on-screen prompts carefully.
- Set a few waypoints in areas you plan to visit and then use the GPS to navigate to each one.
- Test the responsiveness of alert systems and alarms, making sure that they trigger at the right time.
- Monitor the battery consumption during active use to ensure that it meets your expectations, especially on longer trips.
Testing for Accuracy:
- Compare with Another Device. It helps to use a secondary GPS or navigation system to verify that the readings on your main device are accurate.
- Check Against Known Landmarks. Confirm that well-known landmarks, such as buoys or docks, appear correctly on the display.
- Observe Signal Strength. Make sure that the satellite connection remains reliable throughout your test route.
After completing these tests, I note down any observations and adjust configurations as necessary. This detailed testing phase is very important because even minor inaccuracies in GPS readings can lead to larger issues, especially when navigating in unfamiliar waters. I also repeat some of the calibration steps periodically, as environmental factors like weather or nearby electronic interference can influence performance.
This stage of the setup process reinforces the idea that regular maintenance and testing can keep your device functioning at its best. Over time, I have learned that a well-calibrated system not only improves navigation but also helps in planning future fishing trips more effectively.
Step 6: Integrate Additional Features and Technologies
Modern fishing GPS devices often offer far more than just basic navigation. I take advantage of extra features that are designed to make my overall experience on the water even smoother and more informative. Many advanced units include options such as sonar integration, weather data overlays, or even connectivity with smart devices, all of which can radically improve the way you fish.
By exploring these enhanced capabilities, I have discovered that my system grows even more useful in real-world conditions. Integrating options that provide real-time weather updates or route synchronization with multiple devices adds another layer of functionality that I find indispensable for extended trips.
Additional Features Worth Exploring:
- Sonar Integration. Some GPS devices can connect with fish finders, giving you a combined view that shows both underwater structures and potential fish locations.
- Weather Overlays. Real-time weather data can display information such as wind speeds, temperature, and storm forecasts right on your map.
- Route Synchronization. If you use more than one device while out on the water, synchronizing routes ensures that all navigation systems share the same data for a consistent experience.
- Data Logging. Recording your route history is very important for analyzing patterns and planning future trips, as it can help you identify areas that are particularly successful for fishing.
- Bluetooth or Wi-Fi Connectivity. These features allow you to connect your GPS to smartphones or tablets, making software updates and remote control functions much easier to manage.
Tips for Using Integrated Features:
- Ensure that all connected devices update on the same schedule so that the data remains accurate and consistent.
- Regularly check for firmware updates that may offer improvements or additional functionalities for integrated features.
- Keep extra cables, adapters, or connectors on board to quickly resolve any connectivity issues that might arise while on the water.
By taking full advantage of these additional features, I can truly tailor my setup to meet the demands of different fishing conditions. This not only boosts confidence but also allows me to adapt quickly when conditions change. It’s all about mixing in extra functionality to make sure that every trip is as productive and enjoyable as possible.
Step 7: Common Questions and Troubleshooting
Even with the best planning, a few common issues may still arise when setting up a fishing GPS on a boat. Knowing how to resolve these problems quickly and efficiently keeps you confident on the water and well-prepared for any situation that might occur. In this section, I address frequently asked questions and offer practical solutions to everyday challenges.
What if My GPS Device Does Not Establish a Strong Signal?
If my GPS fails to lock onto a clear satellite signal, I check multiple factors to diagnose the issue. First, I inspect the antenna area for any physical obstructions. I also verify that the installation location provides a clear view of the horizon and that no large metal objects are interfering with the signal.
- Ensure that the device faces the sky with minimal obstructions.
- Verify that the mounting spot is optimal and free from interference from other onboard electronics.
- Restart the system to help refresh and renew the satellite connection.
What Can I Do If the Maps Appear Inaccurate?
If I notice that the maps on my device are outdated or display inaccuracies, I immediately check for map updates. It is very important to verify the region settings within the software and to consult the manufacturer’s website for the latest available data. In some cases, switching to an alternative map provider may be advisable if problems persist.
- Confirm that the region settings match the local waterways.
- Review the manufacturer’s website for the most recent map data and software updates.
- Consider trying a different map provider if the inaccuracies continue over time.
How Can I Troubleshoot Device Connectivity Issues?
Connectivity issues often stem from wiring problems or interference from nearby electronic components. To manage these problems, I carefully review the installation guide and inspect all physical connections. Checking for wear or damage in the wiring is an essential part of the troubleshooting process.
- Examine all wiring and connectors for any signs of damage or loose connections.
- Ensure that any adapters or extensions being used are compatible with your device and function properly.
- If the problem persists, contact customer support for additional troubleshooting assistance.
What if the Device Freezes or Crashes?
On occasion, a device may freeze, and a full reboot is usually the quickest fix. I always have a backup plan in place and follow a simple troubleshooting checklist to resolve such issues:
- Perform a soft reset in accordance with the manufacturer’s instructions.
- Examine the device for overheating issues, which may occur during prolonged exposure to direct sunlight.
- Double-check that the software is up to date and free of any known bugs.
Spending time to understand and document each of these common challenges has proven very important. Not only does it help to solve immediate problems, but it also builds a solid foundation of knowledge for preventing future issues. Regularly reviewing troubleshooting steps can smooth the way for a hassle-free experience on each outing.
Final Thoughts and Next Steps
A solid fishing GPS setup is one of the best investments I have made for my boating adventures. Through careful planning, methodical installation, and regular testing, my GPS system reliably assists me in pinpointing excellent fishing spots while ensuring safe navigation on open waters.
My Action Plan for a Successful Setup:
- Choose a device that meets the specific challenges and conditions of your marine environment.
- Review installation guidelines thoroughly and mount the device securely on your boat.
- Keep the software and maps updated to ensure the highest level of navigational accuracy.
- Customize the settings to match your fishing style, including waypoints, alerts, and extra features.
- Test the device in calm conditions before venturing out on a major adventure, and calibrate as necessary.
- Consider integrating additional technologies, such as sonar or real-time weather overlays, to elevate your performance.
- Keep troubleshooting tips close at hand and review your user manual when unexpected issues arise.
Taking these practical steps has all together improved the quality of my fishing trips. By investing extra time in planning and setup, I am able to spend more moments enjoying the water and less time fussing with technical issues. I recommend beginning with small tests on your local waters before planning a long adventure, ensuring that you build confidence in your device’s capabilities gradually.
Over time, you may find that your setup evolves as you learn more about your own preferences and how your boat handles various conditions. It is very important to stay curious and keep an eye out for any emerging technologies or updates that might further refine your system. Regular maintenance, occasional reconfigurations, and a commitment to learning from each outing can transform a simple navigation tool into an indispensable partner on the water.
If you have encountered any challenges or have tips to share about setting up a fishing GPS on your boat, please feel free to share your experiences with fellow boaters. Your insights can help others enjoy smoother, more productive fishing trips, turning every outing into a success story. Remember, every bit of extra preparation leads to hours of relaxed, worry-free fishing on open waters.
Wrapping up, investing your time and energy into properly setting up and maintaining your fishing GPS ensures that the technology works in tandem with your skills. Enjoy the thrill of discovering new fishing spots, safe navigation through challenging waterways, and the rewarding experience of a well-planned trip on the water. Bottom line: a well-configured system not only makes your fishing trips more productive, it also lets you truly savor every moment at sea.
As an Amazon Associate I earn from qualifying purchases.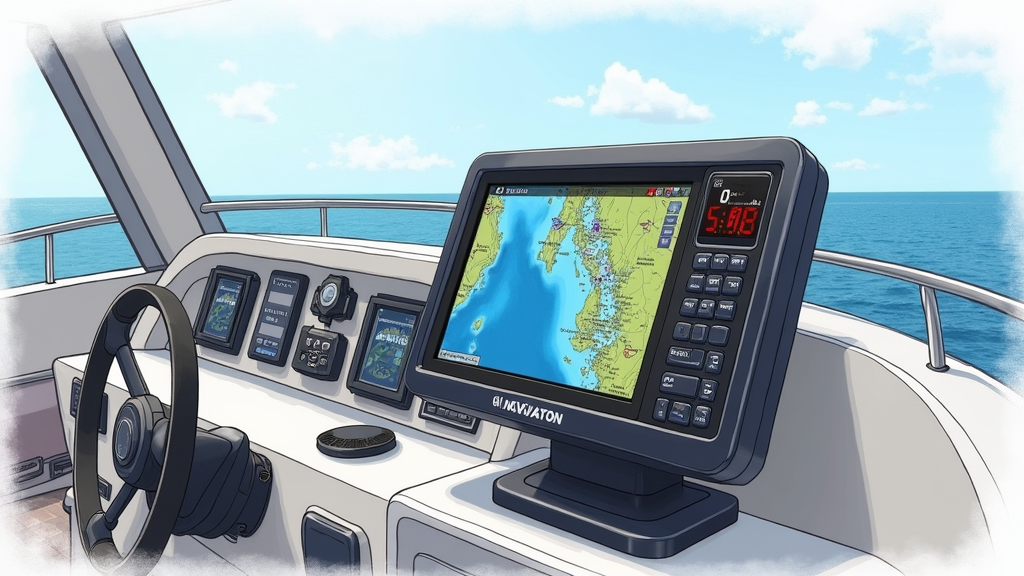

Really appreciate how thorough this guide is, setting up a fishing GPS can feel overwhelming the first time, and you covered every step in a way that actually makes sense. I especially liked the reminder to double-check wiring and signal interference. I’ve had a GPS act weird before and didn’t realize nearby electronics could be the culprit.
The part about calibrating on calm water before a bigger trip is solid advice too. I learned that the hard way after heading out without testing first.
Quick question: do you think it’s better to start with a standalone GPS unit or go straight for a combo GPS + fish finder setup if someone’s still fairly new to boating?
Thanks so much — really glad the guide helped! And yeah, wiring and interference issues can be sneaky. A GPS acting up because of a nearby radio or battery connection is one of those things you usually only learn after it happens once.
As for your question, both options work, but it depends on the person:
• Standalone GPS:
Great if someone wants the simplest setup with fewer menus to learn. It keeps navigation separate, which some beginners find less overwhelming.
• Combo GPS + Fish Finder:
If they’re even a little interested in fishing, a combo unit is usually worth it. Modern combos are pretty intuitive, and having depth + structure info alongside navigation is a big advantage once you get the hang of it. Plus, you only need to install and power one device.
If the budget allows, I’d lean toward the combo — beginners outgrow standalone GPS units pretty fast. But if someone just wants reliable navigation with zero extras, standalone is perfectly fine.
Hope that helps!