Understanding marine radar is crucial for anyone looking to steer ships safely and efficiently. Being skilled with marine radar helps seafarers spot and monitor nearby vessels, landmasses, and potential hazards, especially when visibility is poor or during night operations. My own experience as a trainee made me realize how reliable radar data builds confidence when planning safe passages and keeping a good lookout. Here, I’ll walk through the basics of marine radar systems for navigation and break down what every deck cadet, junior officer, or new navigator needs to know: from core technical ideas to best practices and important tips you’ll use every day on board.
How Marine Radar Works: The Basics
Marine radar uses radio waves to detect objects around the vessel. During my first session in the simulator in heavy fog, I immediately understood its value. Signals are sent as short pulses from the radar antenna. When these pulses hit a solid object, such as another ship, a buoy, or a landmass, they bounce back to the antenna. The radar system measures the time it takes for signals to return, which tells you the distance to the object. The direction the antenna is pointing indicates the object’s bearing, and this information is displayed instantly.
Most navigation radars use pulsed transmission, in which a strong burst is transmitted, followed by a listening phase. Signal processing circuits filter out noise and make useful echoes clearer. This is where display units become very helpful; they make it easier to understand echoes, so you can judge size, shape, and movement. Seeing the radar in action during mock collision avoidance drills really highlighted how solid signal processing makes a difference in real-world decision-making.
Main Components of a Marine Radar System
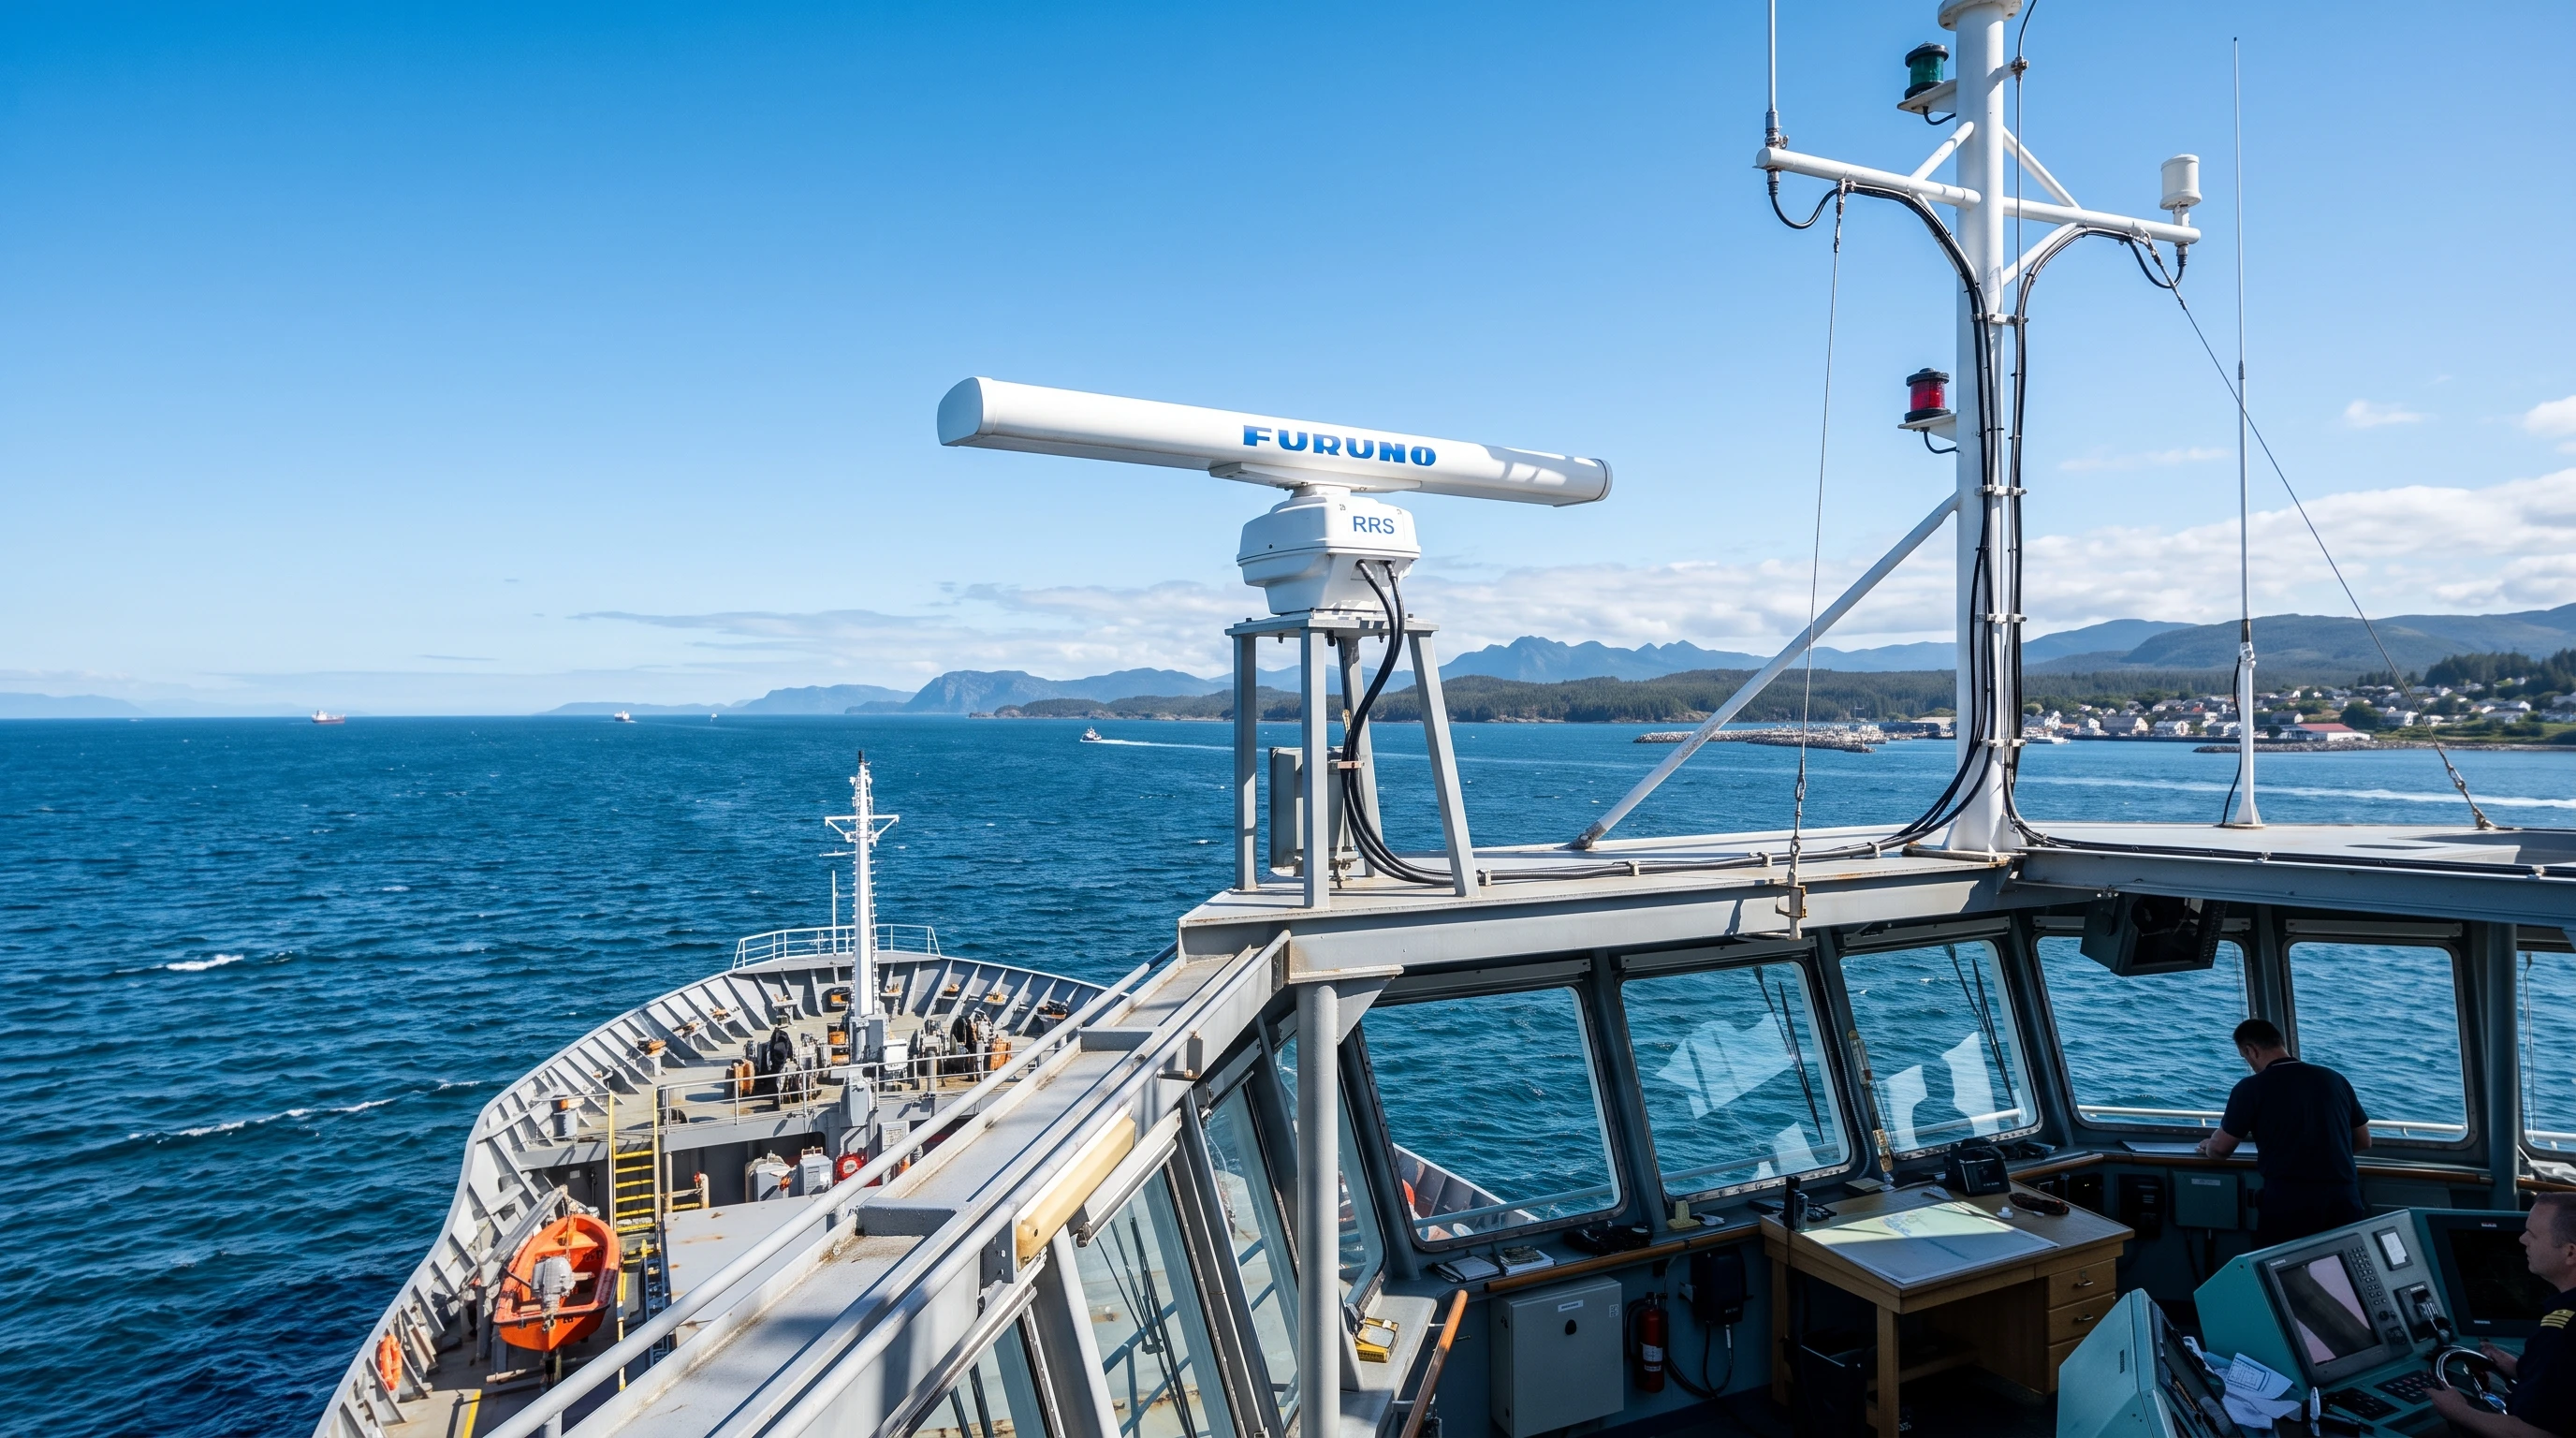
Every navigation radar setup includes four main pieces. I got to know each part during my first machinery tour on board. Here’s a quick rundown:
- Antenna/Scanner: This part rotates or sweeps, sending out radio pulses. Its height and spot on the ship directly help determine how far your radar “sees.”
- Transceiver: This section generates outgoing radio pulses and receives any reflected signals. Most systems install transceivers close to the antenna to minimize signal loss.
- Display Unit: Shows radar images as bright marks on a screen, usually with a plan view of your own ship at the center. Modern displays are easy to read and equipped with digital overlays, VRMs, EBLs, and other handy tools.
- Power Supply: Feeds the entire setup with electrical power, either directly or using shipboard transformers or inverters.
Marine Radar System Reviews consistently note that regular maintenance and checks, especially for moving parts and key connections, keep the system reliable and help avoid sudden malfunctions.
X Band vs S Band Radar: Differences and Use Cases
Ships often use two types of marine navigation radar: X band (about 9 GHz) and S band (roughly 3 GHz). Each has its own strengths. On my first bridge watch, the officer explained that X-band radars are great for detailed, close-range work—such as spotting small buoys or light craft. However, these radars can be affected by heavy rain and sea clutter.
S-band radars use a lower frequency and a longer wavelength, making them better at picking up targets in heavy rain, fog, or sea clutter. Larger vessels and passenger ships commonly have both types, so you always have the best possible display no matter the weather.
- X band (9 GHz): Gives high-level detail, ideal for small targets and clear weather.
- S-band (3 GHz): Handles rain and sea clutter well and is preferred for long-range work in rough weather.
Switching between the two based on the situation is routine at sea. Understanding this difference is always part of Marine Radar Equipment for Beginners classes and operator courses.
Key Radar Controls and Settings
To make the most of any radar, you have to know which controls to use and what they do. Beginners spend a lot of time on this, but with practice, these adjustments become automatic. Here are some basics:
- Gain: Makes signals stronger or weaker. Turning gain up boosts the number of echoes, but too much and the real targets can get swamped. If it’s too low, key contacts might disappear. Adjust so contacts are clear, but with minimal noise.
- Sea Clutter: Filters out echoes from waves nearby, which can otherwise fill the screen, especially in choppy weather. I always check this whenever the sea gets rougher.
- Rain Clutter: Reduces signals from rain between your ship and other targets. Works best at moderate settings. It can’t remove all rain clutter, but it helps you see targets better than none at all.
- Tuning ensures the radar works at the clearest frequency and offers the best range. Some units do this automatically, but on many systems, manual adjustment yields more from the setup. This is a normal part of startup checks and is revisited often.
Getting good with these controls comes with practice, but it’s an essential skill covered in the Marine Radar System Installation Guide and every bridge equipment training session.
Range and Bearing Measurement: Using VRMs and EBLs
To keep track of your position and monitor other contacts, you need both range (distance) and bearing (direction). VRMs (Variable Range Markers) and EBLs (Electronic Bearing Lines) come in handy here.
Every radar plotting drill I did relied on these tools. Here’s what they’re for:
- VRM: An adjustable ring you move to line up with your target. The measured range appears, letting you see how far away something is.
- EBL: A line that spins around your ship’s position on the screen. Align it over a target, and the display provides an accurate bearing, either to north or relative to your ship’s heading line.
Using both VRMs and EBLs is a proven, quick method for fixing your position, assessing collision risks, and tracking marks, even when visibility gets rough. These are everyday tools for bridge watchkeeping and are featured in Best Practices for Marine Radar Use guides.
Radar’s Role in Collision Avoidance and ARPA Integration
Radar is your best tool when a direct visual lookout isn’t enough. Many modern navigation radars feature ARPA (Automatic Radar Plotting Aid), which automates target tracking and predicts movements. When I used ARPA for the first time, it helped me determine another ship’s CPA (Closest Point of Approach) and TCPA (Time to CPA), allowing me to make informed decisions to avoid collisions.
With ARPA onboard, radar can automatically track multiple contacts and assign vectors showing their headings and speeds. Officers count on this for early warning and planning, especially in traffic separation zones or busy approaches. COLREGS Rule 7 tells us to use every method, including radar, for judging collision risk. ARPA handles most of the tedious number-crunching, giving you more time to react.
The STCW Code (Table A-II/1 and A-II/2) spells out radar and ARPA requirements for watchkeepers. Most academies use simulator-based exercises that copy real bridge scenarios using ARPA. Regular practice with these lets you get faster and more confident at tracking and acting to avoid other ships. The Benefits of Marine Radar in Navigation are crystal clear during these training runs.
Common Limitations and Best Practices for Safe Radar Use
Like any system, marine radar has its flaws. Knowing about these helps you avoid relying solely on radar and missing vital clues.
- Blind Sectors: Some areas get blocked by masts, cranes, or superstructure, creating shadow spots that radar can’t reach. I make it a habit to study the ship’s drawings and remember them before starting a passage.
- False Echoes: Sometimes, signals bounce in odd ways and create fake targets. With experience, you’ll learn to spot fakes based on their odd movement or by checking how they stay (or don’t) across several sweeps.
- Weather Effects: Conditions like heavy rain, rough seas, or snow can reduce radar range and accuracy. This is when S-band radars and careful use of gain, sea, and rain clutter controls matter the most.
- Target Discrimination: When many targets are close together, their echoes might blend. Zooming in, using EBLs and VRMs, or swapping radar bands helps you figure it out.
- Regular Calibration: Radar drift or screen misalignment can lead to errors. Checking alignment in clear weather and recording those settings pays off in rough conditions.
Always matching radar contacts with visual checks and AIS makes your awareness way better. This is stressed in every Marine Radar System Reviews post and is practiced in bridge team management training. COLREGS Rule 5 and Rule 7 both require a lookout and that you assess collision risk using radar as part of the overall bridge toolkit.
Best Practices for Marine Radar Use
- Always combine visual and radar lookouts, especially at night or during foggy conditions.
- Adjust controls for the clearest target display, not just the strongest signal.
- Check for and record blind sectors every watch in the bridge log.
- Practice reading radar images with VRMs, EBLs, and ARPA. Familiarity shortens response time.
- Pair radar with ECDIS overlays (if available) for a boost in confidence during navigation and while avoiding collisions.
- Calibrate the system in good visibility conditions and reference those settings when the weather turns bad.
Marine Radar and International Regulations (STCW & COLREGS)
Global maritime rules such as the STCW Convention (Standards of Training, Certification & Watchkeeping for Seafarers) and the COLREGS (International Regulations for Preventing Collisions at Sea) set standards for radar operation. STCW requires officers to be competent in radar and ARPA setup, operation, and reading. COLREGS require the use of every available tool, including radar, to spot collision risks and confirm vessel identities. These regulations shape daily routines and checklists on most vessels today.
The key ideas behind marine radar are also covered in bridge resource management and simulator training, where you learn to handle stress and practice smart radar techniques that match real sea conditions.
Frequently Asked Questions
Question: What’s the biggest initial challenge when learning marine radar?
Answer: For me, filtering out clutter and picking out actual targets was the toughest at first. Practicing in different visibility conditions and getting tips from senior officers paid off. Many Marine Radar System Reviews recommend using simulators for extra practice before handling real radars at sea.
Question: How do I switch between X-band and S-band radar on the bridge?
Answer: Bridge displays usually have a switch or input for both. The choice depends on weather, visibility, and what you need for the current leg of your route. Most Best Practices for Marine Radar Use guides recommend using X-band for the best detail in calm conditions, switching to S-band in foul weather or heavy rain.
Question: Can I rely solely on ARPA for collision risk?
Answer: ARPA is a powerful backup, but always double-check ARPA output with raw radar data and, if possible, with visual or AIS overlays. Marine Navigation Technologies agrees that ARPA is an aid, not a total replacement for solid seamanship and a vigilant lookout.
Wrapping Up
Every junior officer or cadet gets a boost from building radar skills. Working with basic controls, understanding radar’s core functions, and being prepared for challenging weather are all keys to safe navigation. As you gain sea time and hands-on radar experience, you’ll grow in judgment and handle tough real-world situations with more confidence. Keeping up with Marine Navigation Technologies, reading the latest on radar fundamentals, and referencing STCW and COLREGS standards will help you stay sharp on every crossing.
Start practicing your radar skills today. Each watch, every radar check, and every real-world decision gets you closer to expert navigation at sea.
This article was created with AI assistance and reviewed by a human editor.
About The Author


